Getting Started With The taxPRO Builder
The Basics
The taxPRO Website Builder comes in two forms: The standard “Back-end Builder” and the front-end “Visual Builder.” Both interfaces allow you to build exactly the same types of websites with the same content elements and design settings. The only difference is the interface. The Back-end Builder lives inside of the WordPress Dashboard and it can be accessed along with all of the other standard WordPress settings. If you are familiar with WordPress, this may be a more efficient way for you to edit your site. taxPRO is best used in visual mode, allowing you to build your page on the front-end of your website.
This tutorial will mainly focus on the visual builder.
(For complete documentation, click on “FULL GUIDE” in your taxPRO dashboard.)

PRODUCT TOUR
You cannot do the tour later after it has started, so before you begin, grab your coffee / tea and enjoy the presentation.
Follow these guidelines to start training…
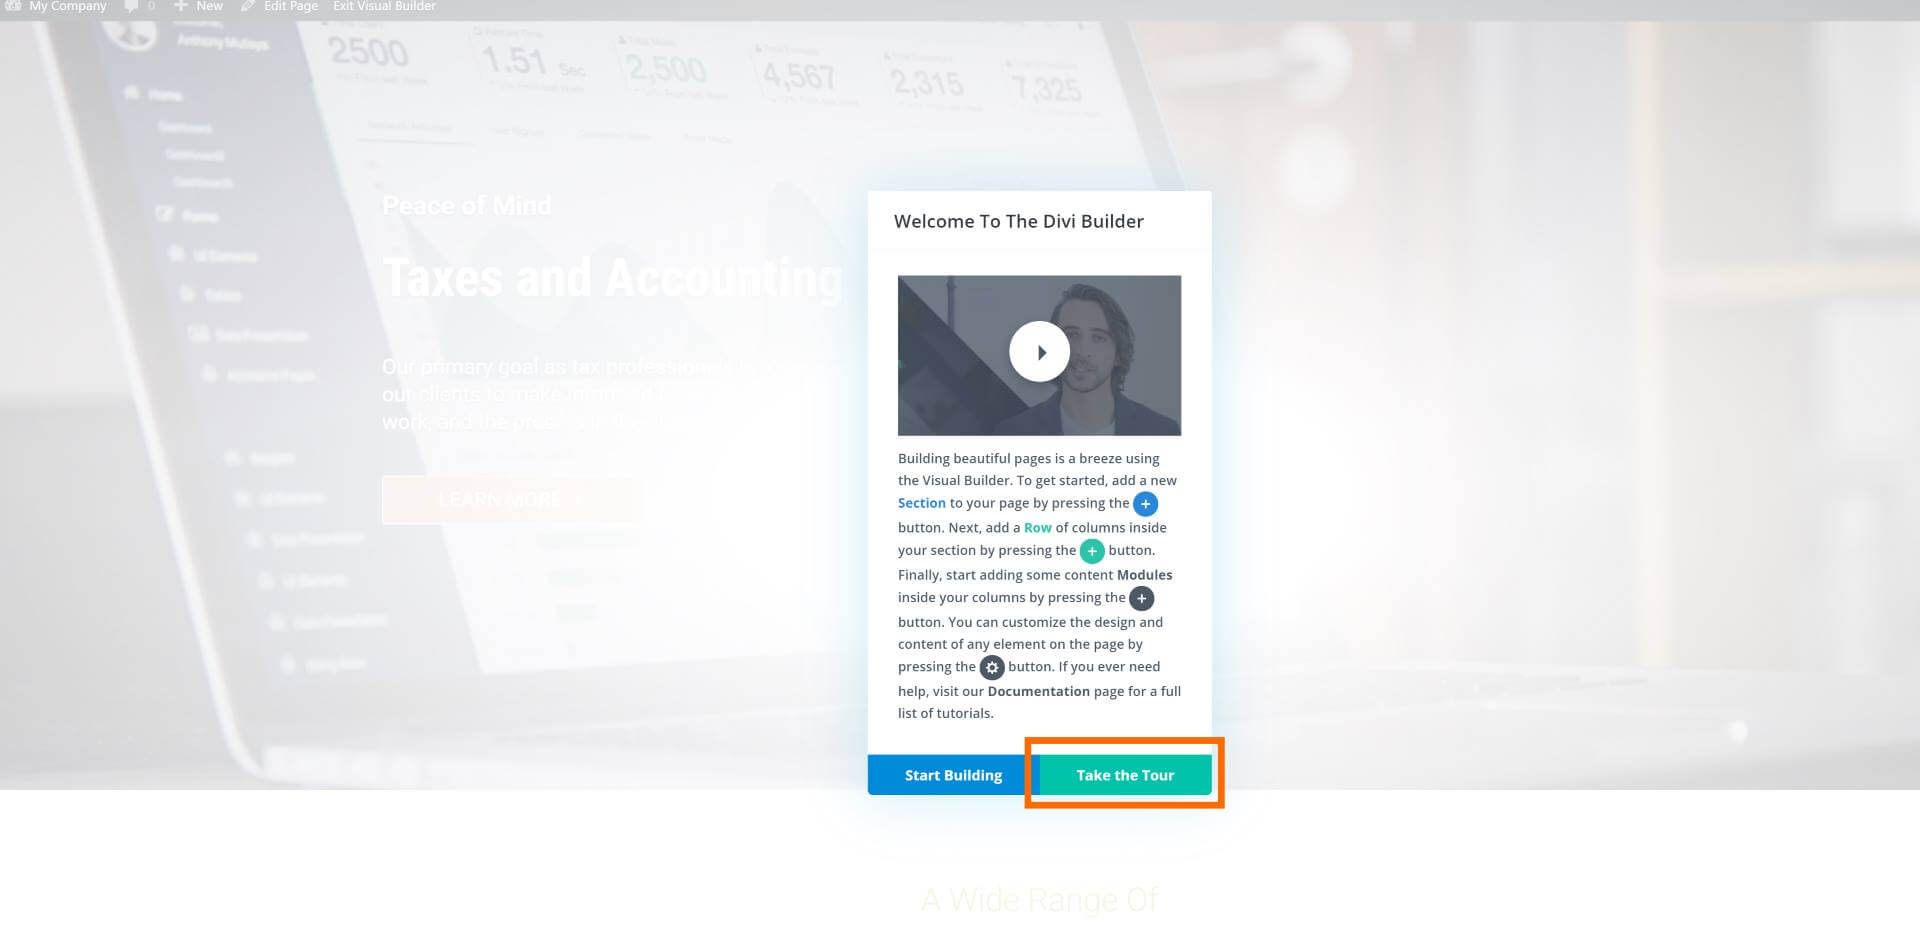
- Open the tour by logging in to your website, then going to the home page and click on ‘Enable Visual Builder’
- Click “Take the Tour” to get started. NOTE: it only allows you to do this once. Please make sure you have your coffee, popcorn and turn your cell phones off.
Your taxPRO software is your main work environment and has all the tools you will need to make your website a success.
Enabling The Visual Builder

The Visual Builder Basics
taxPRO’s power lies in the Visual Builder, a drag and drop page builder that allows you to build just about any type of website by combining and arranging content in sections, rows and modules.
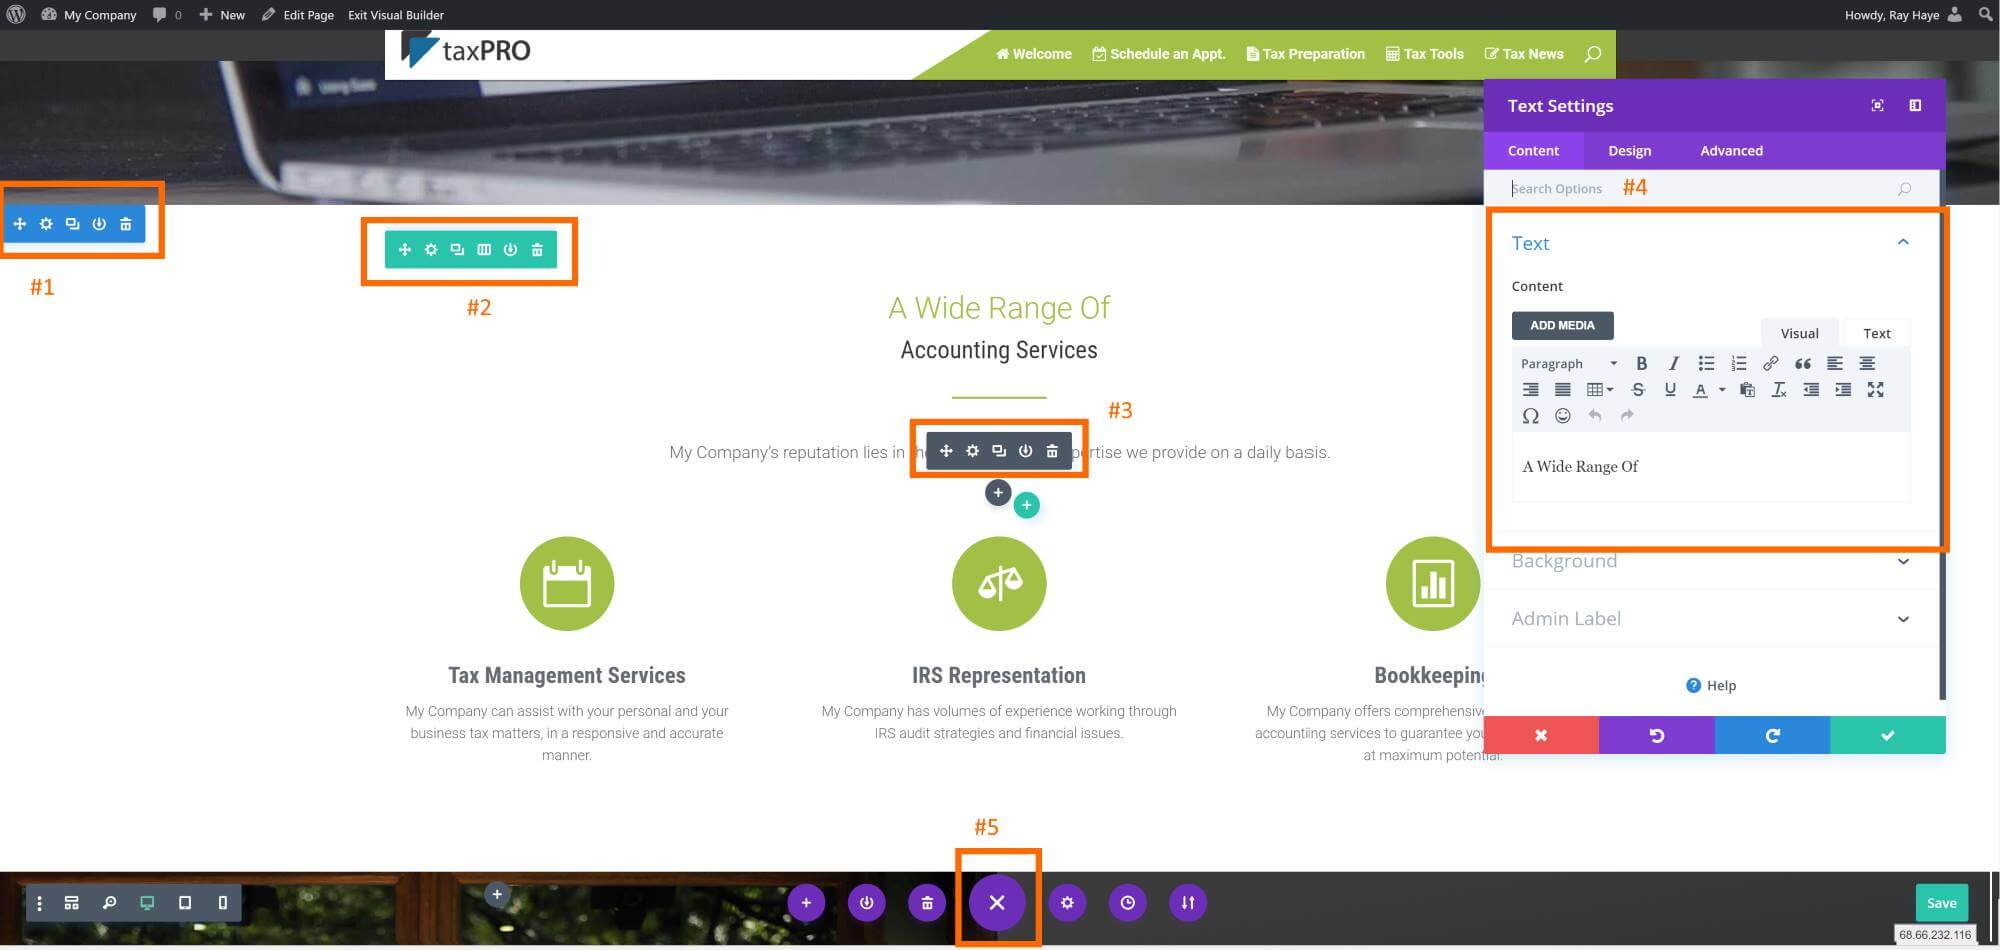
The builder uses three main building blocks: Sections (#1 in BLUE), Rows (#2 in GREEN) and Modules (#3 in DARK GRAY). Using these in unison allows you to create a countless array of page layouts. Sections are the largest building blocks, and they house groups of rows. Rows sit inside of sections. Modules are placed inside of rows. This is the structure of every taxPRO website.
Modules will be what you will use the most. (#4). These are opened by clicking the GEAR icon. Text, headings, images and buttons are just a few modules. (NOTE: All items use the gear to open that items editor. Sections, Rows and Modules use the GEAR symbol)
Once you complete your edits, you will use the System tool (#5, PURPLE icon) to save your edits, When clicked, this opens to display the SAVE as well as other features.
IMPORTANT: The builder has built in ? HELP with videos for every single feature. Try this out as you are editing to see what tools are available for you.
EDITING TEXT
The one feature that will be the most used are the text editing tools. Whether changing your address, advertising, or writing that great tax blog post. Check out how easy it can be to make those edits.
The 'Module' Editor
First find the module of text you wish to edit. Use the ‘EDIT ITEM’ icon to open the text editor.

Edit text using a text module

Edit text using a direct click

Another note is that the very top of your site (called the HEADER) or the bottom section (FOOTER) need to be edited in a different manner. These will be discussed in a later tutorial. For now, if you need a change in one of those sections, we will do the update for you at no charge. Enter a ticket at https://store.taxprowebsites.com/ticket
The end of BASICS
This ends the basics of training. Make sure to do the full interactive tutorial and make a few adjustments to your sites text to learn more.
For the full documentation, click on FULL GUIDE in your taxPRO dashboard.