Setup the Appointments Calendar
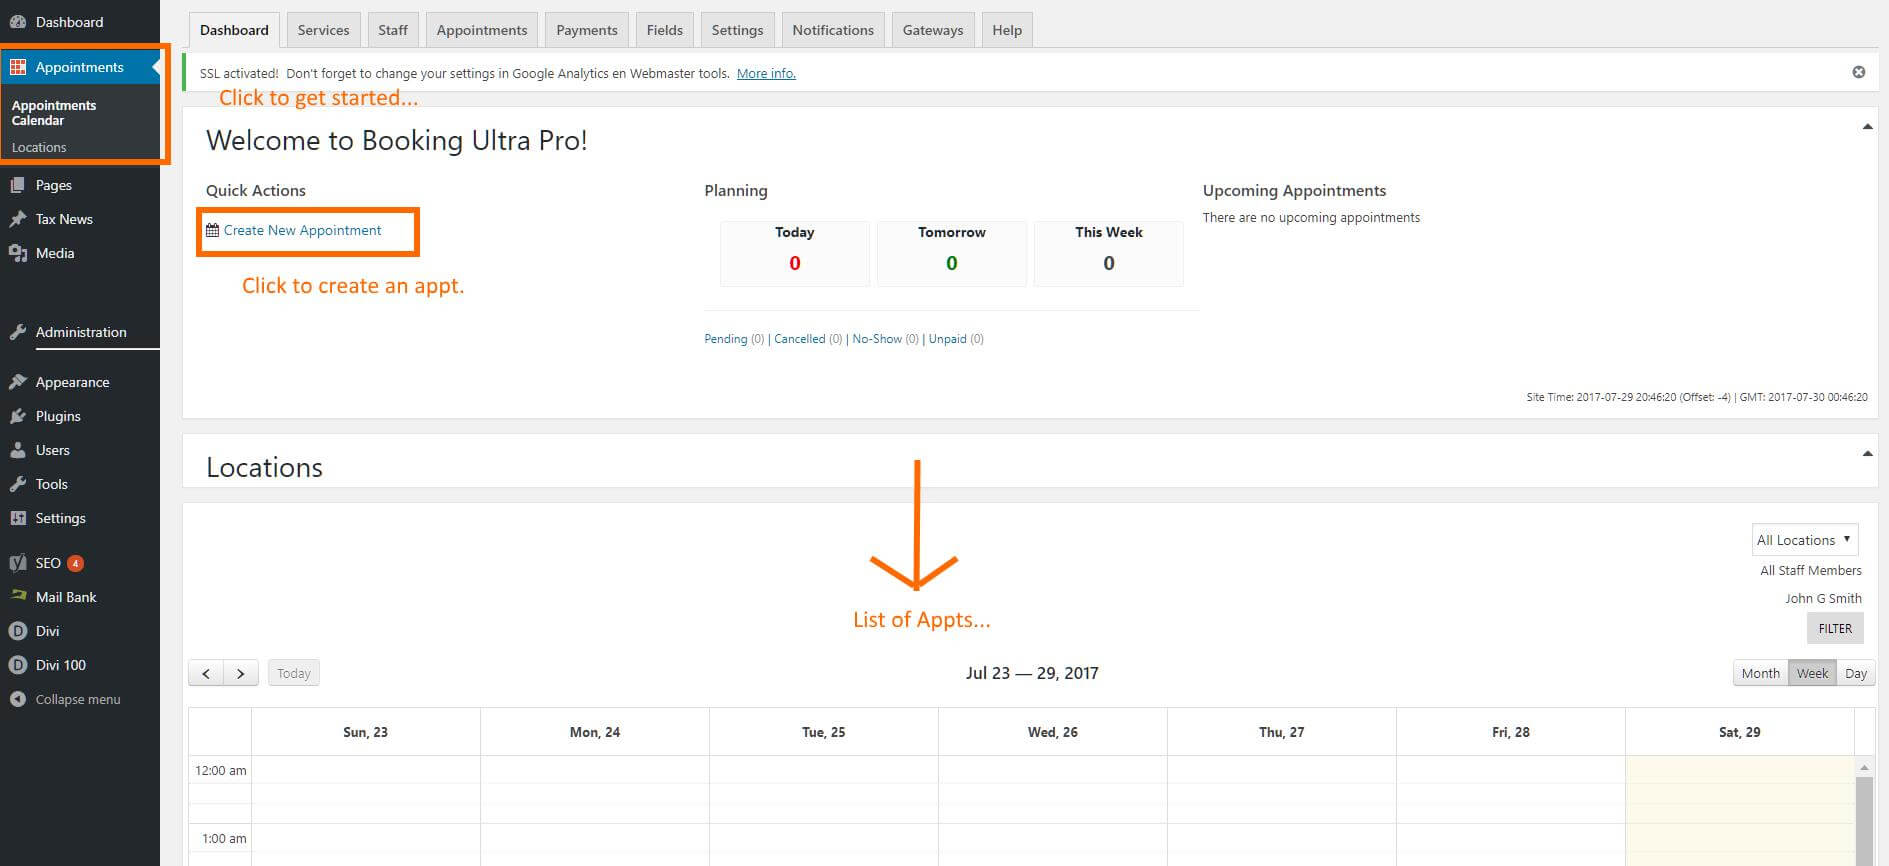
Quick Start: Appts. Calendar
This tutorial will mainly focus on the quick setup of a single employee.
Basics
This area will allow you to “Create an Appt” or view your appts. Let’s move to the “Services” tab.
Finally, you can take deposits for appts to prevent no-shows. Send us a quick note using your contact form in your taxPRO dashboard to hear more about this feature.
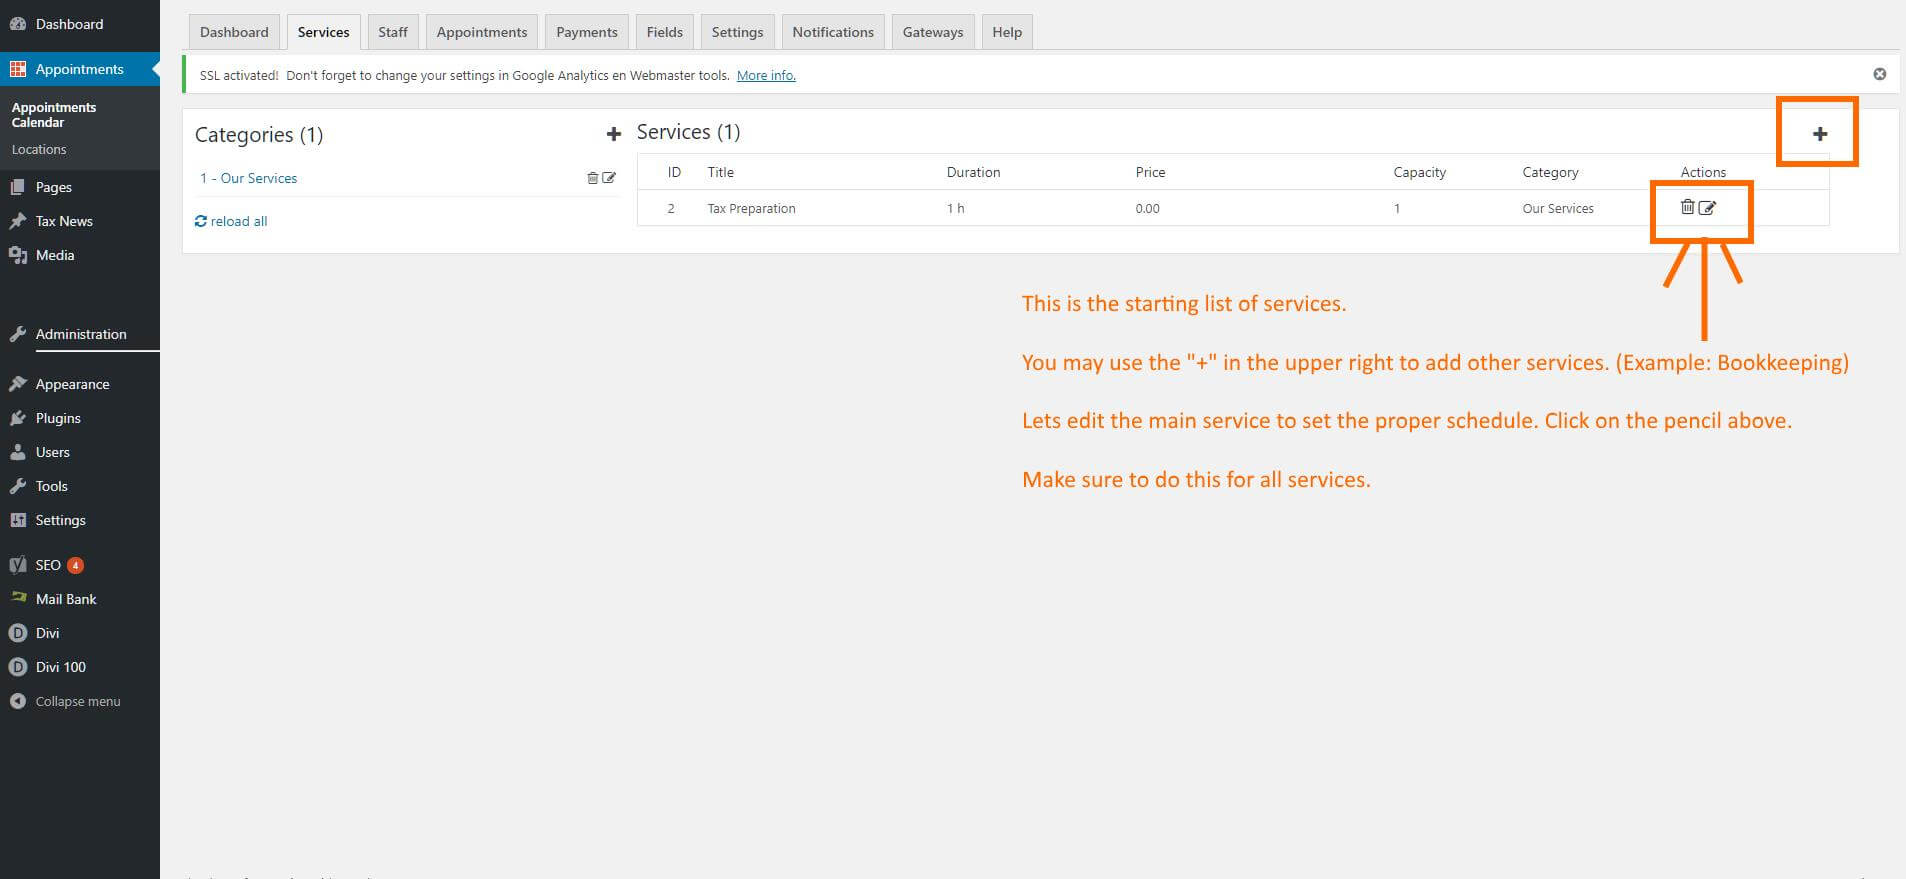
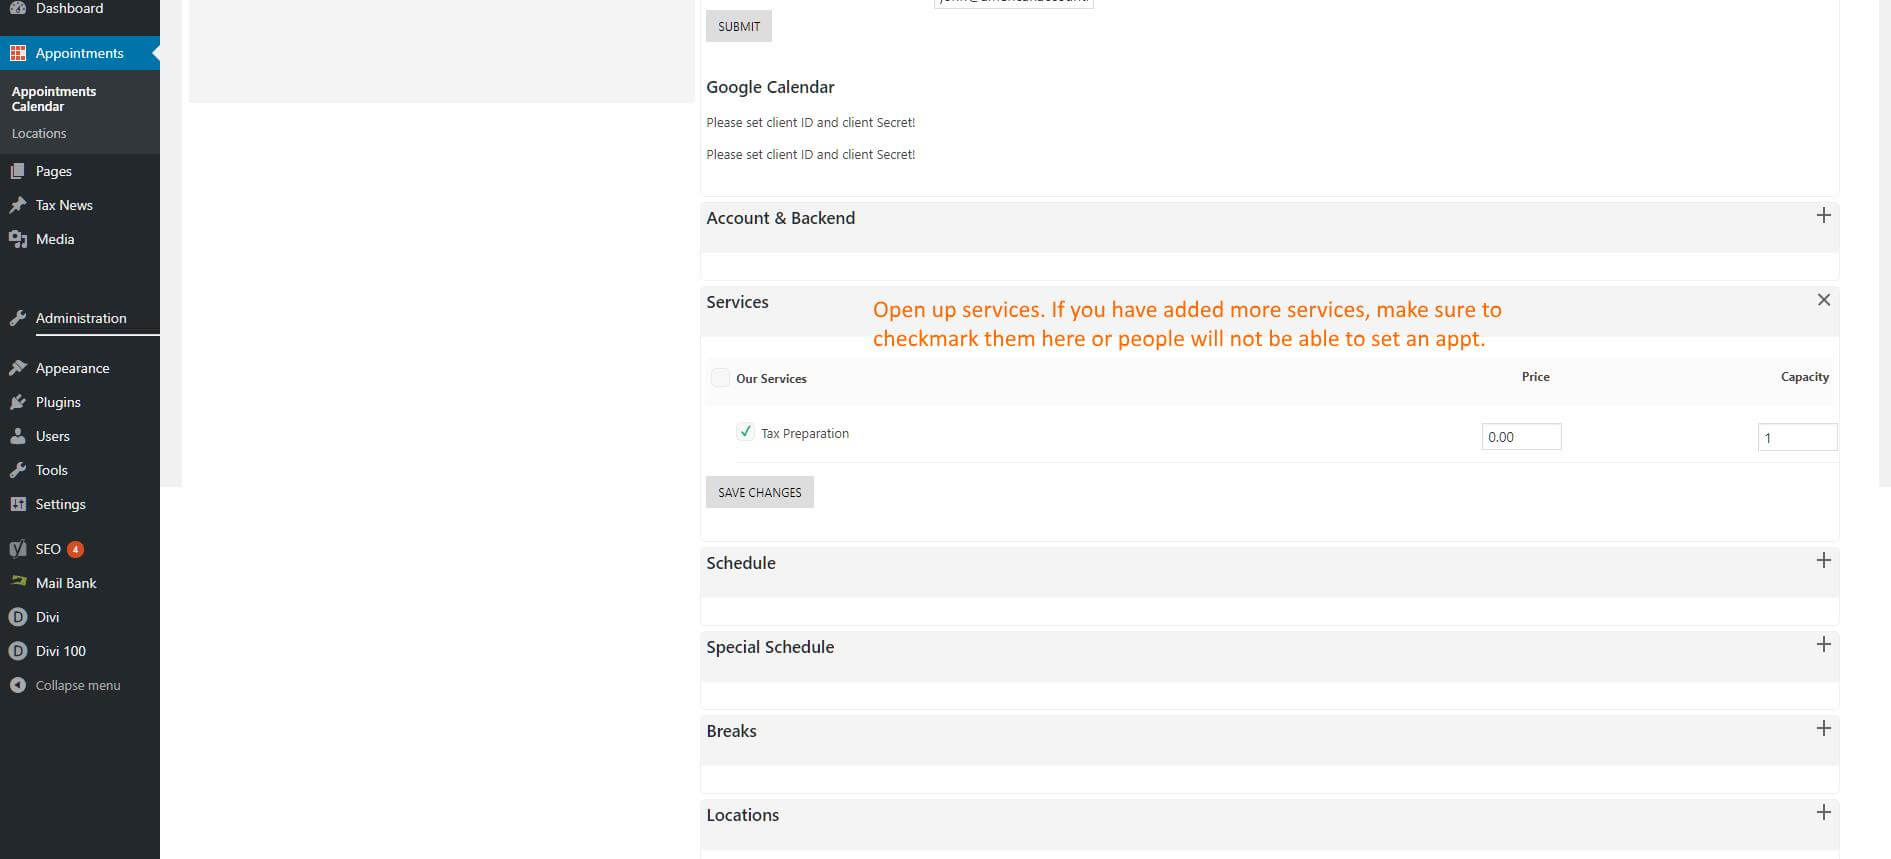
The 'Services' Tab
For now lets edit the one service. Click on the pencil icon to continue…
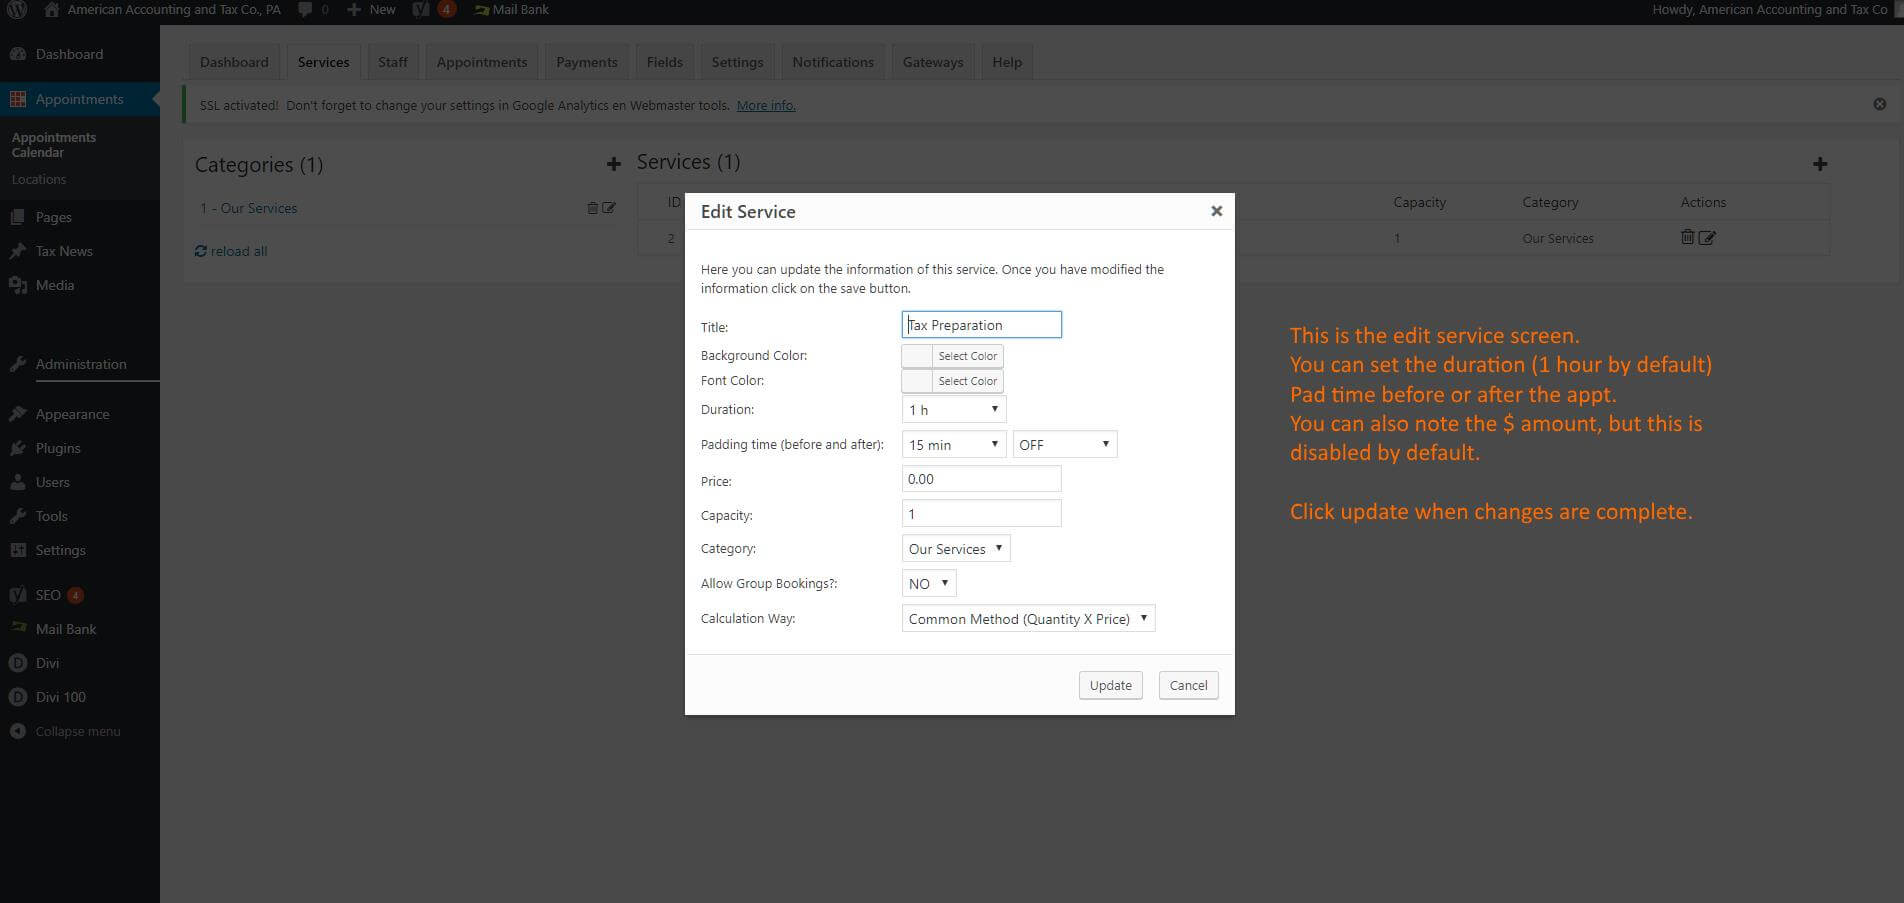
Adjust for your schedule
You can even add a price, though this is disabled by default.
VERY IMPORTANT:
Edit your Services
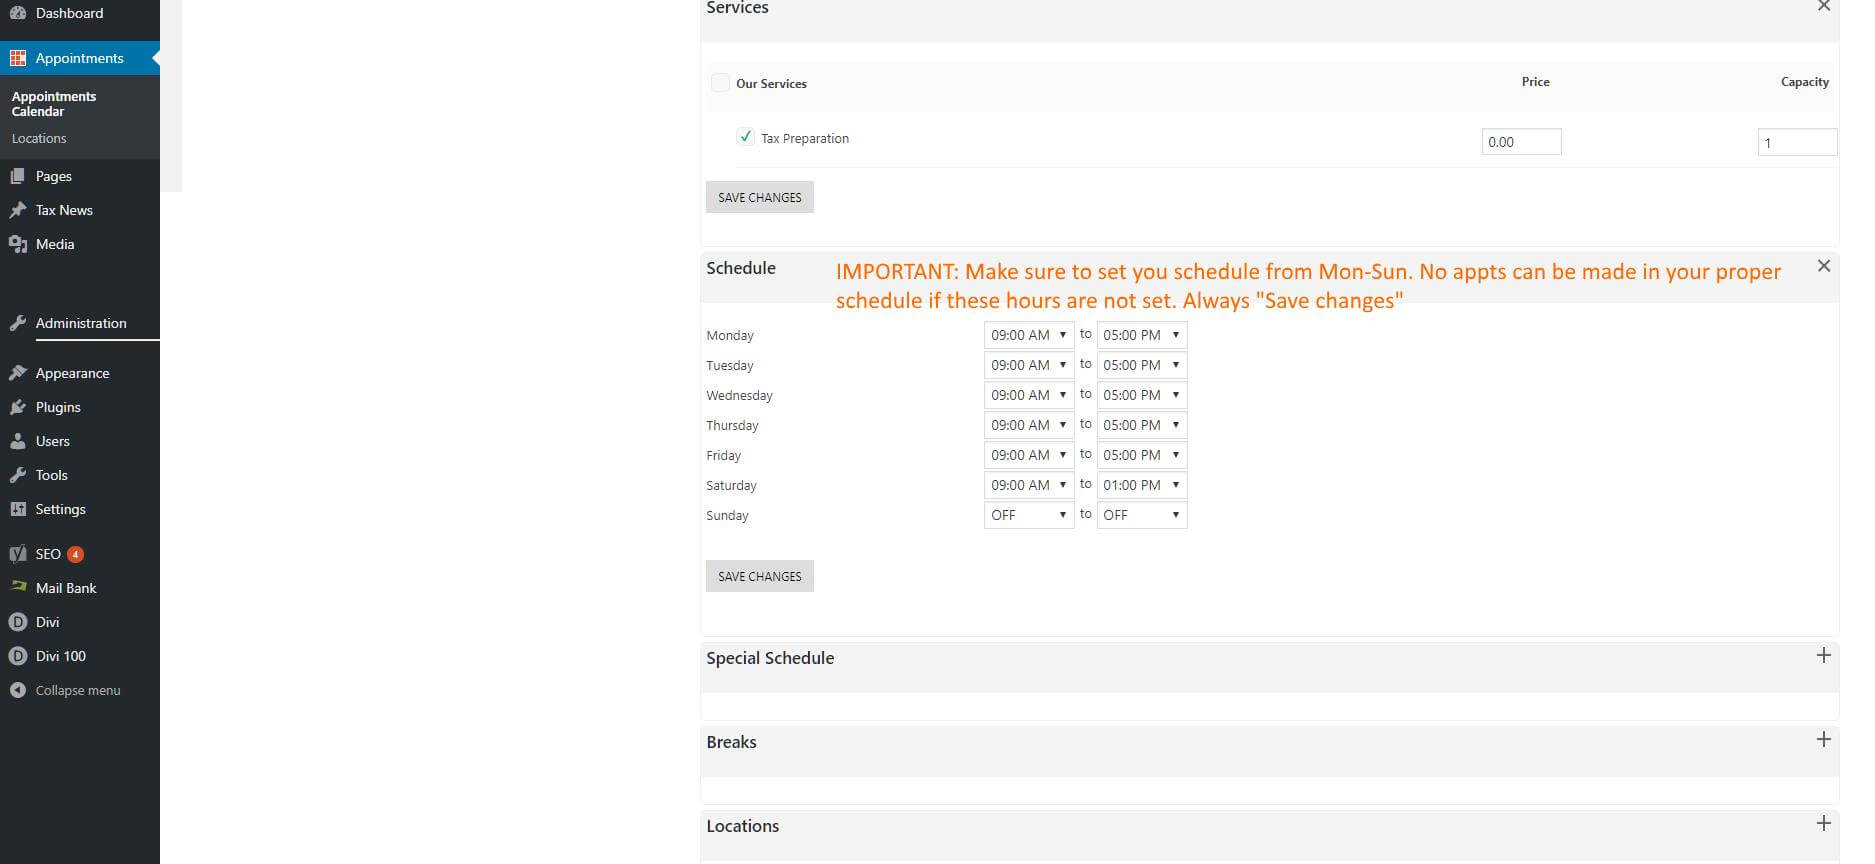
IMPORTANT: SCHEDULE
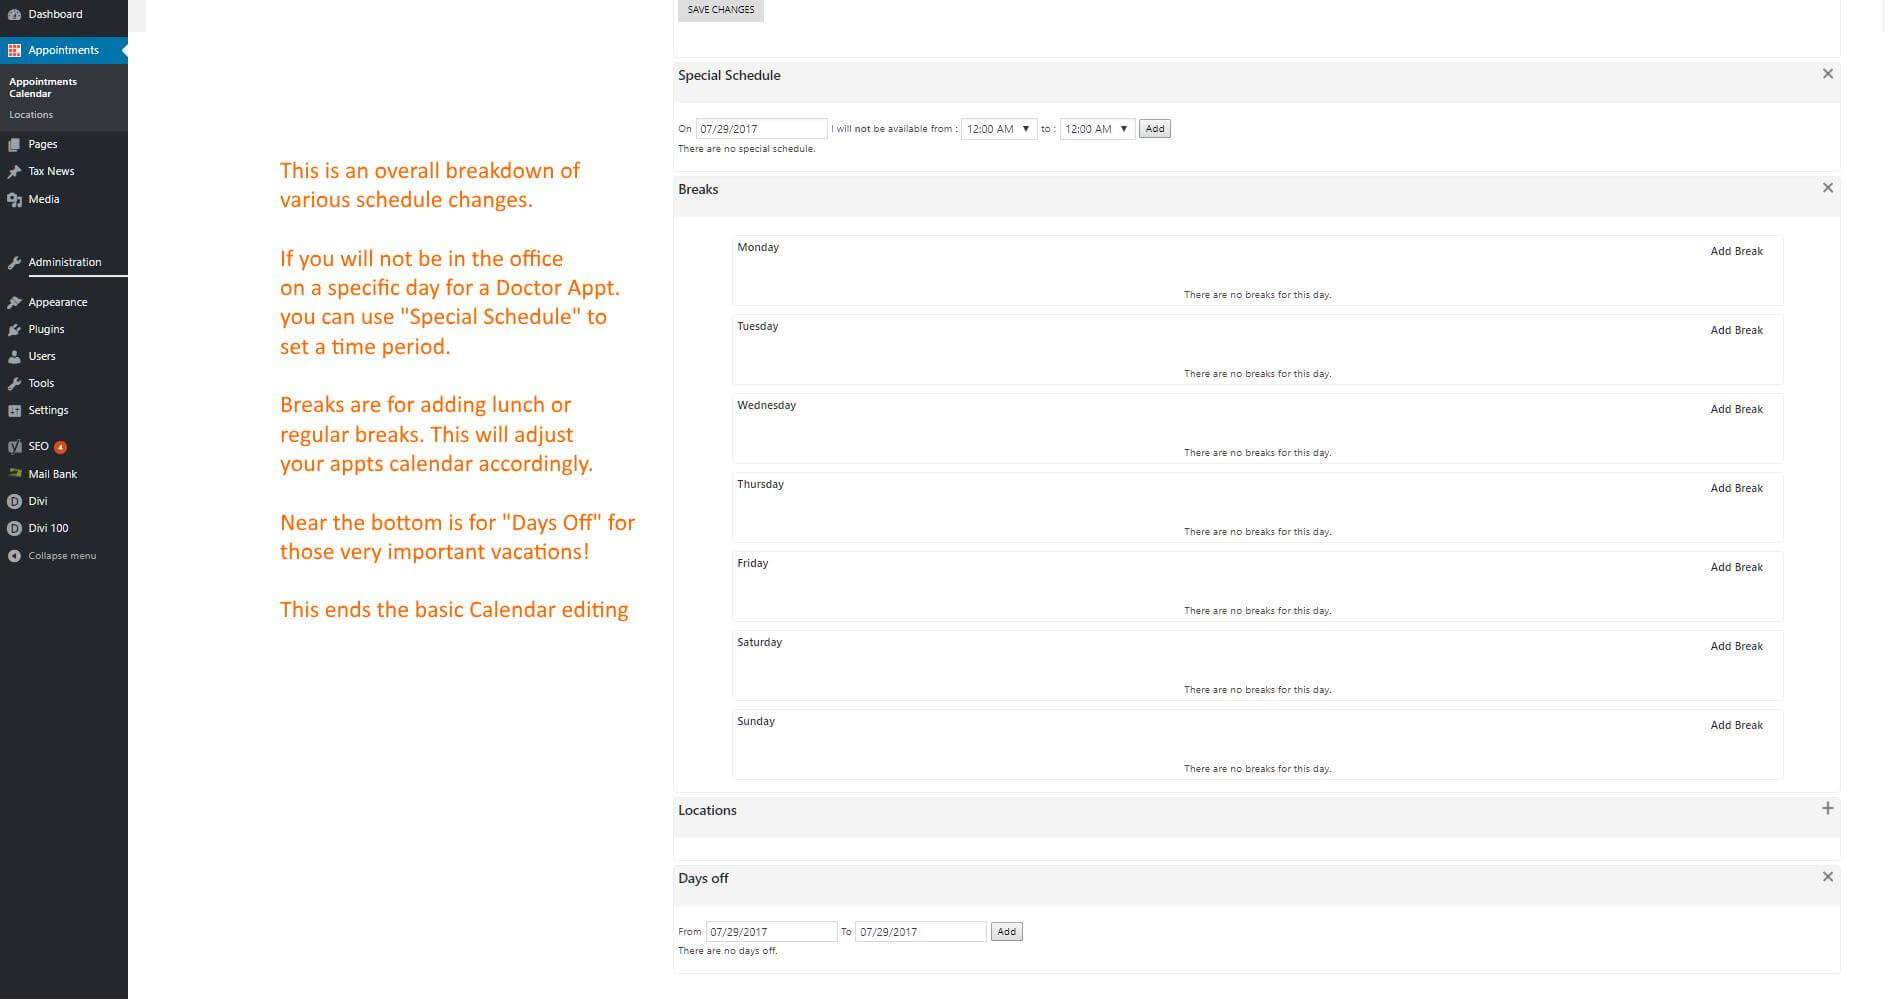
TIME OFF AND VARIATIONS
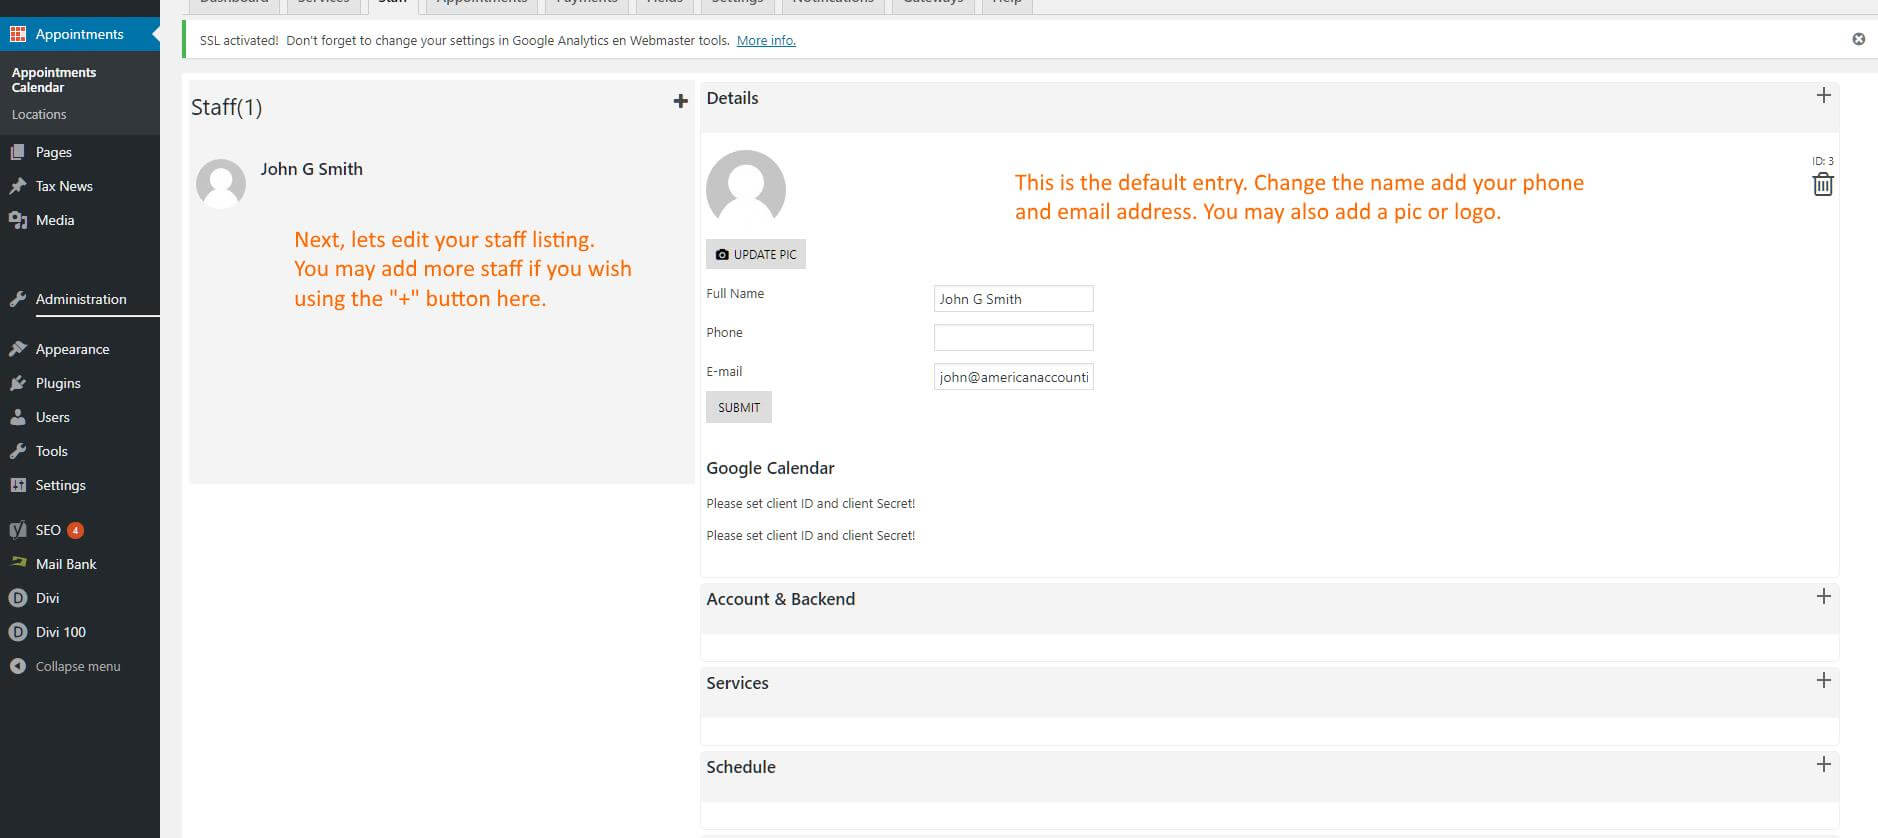
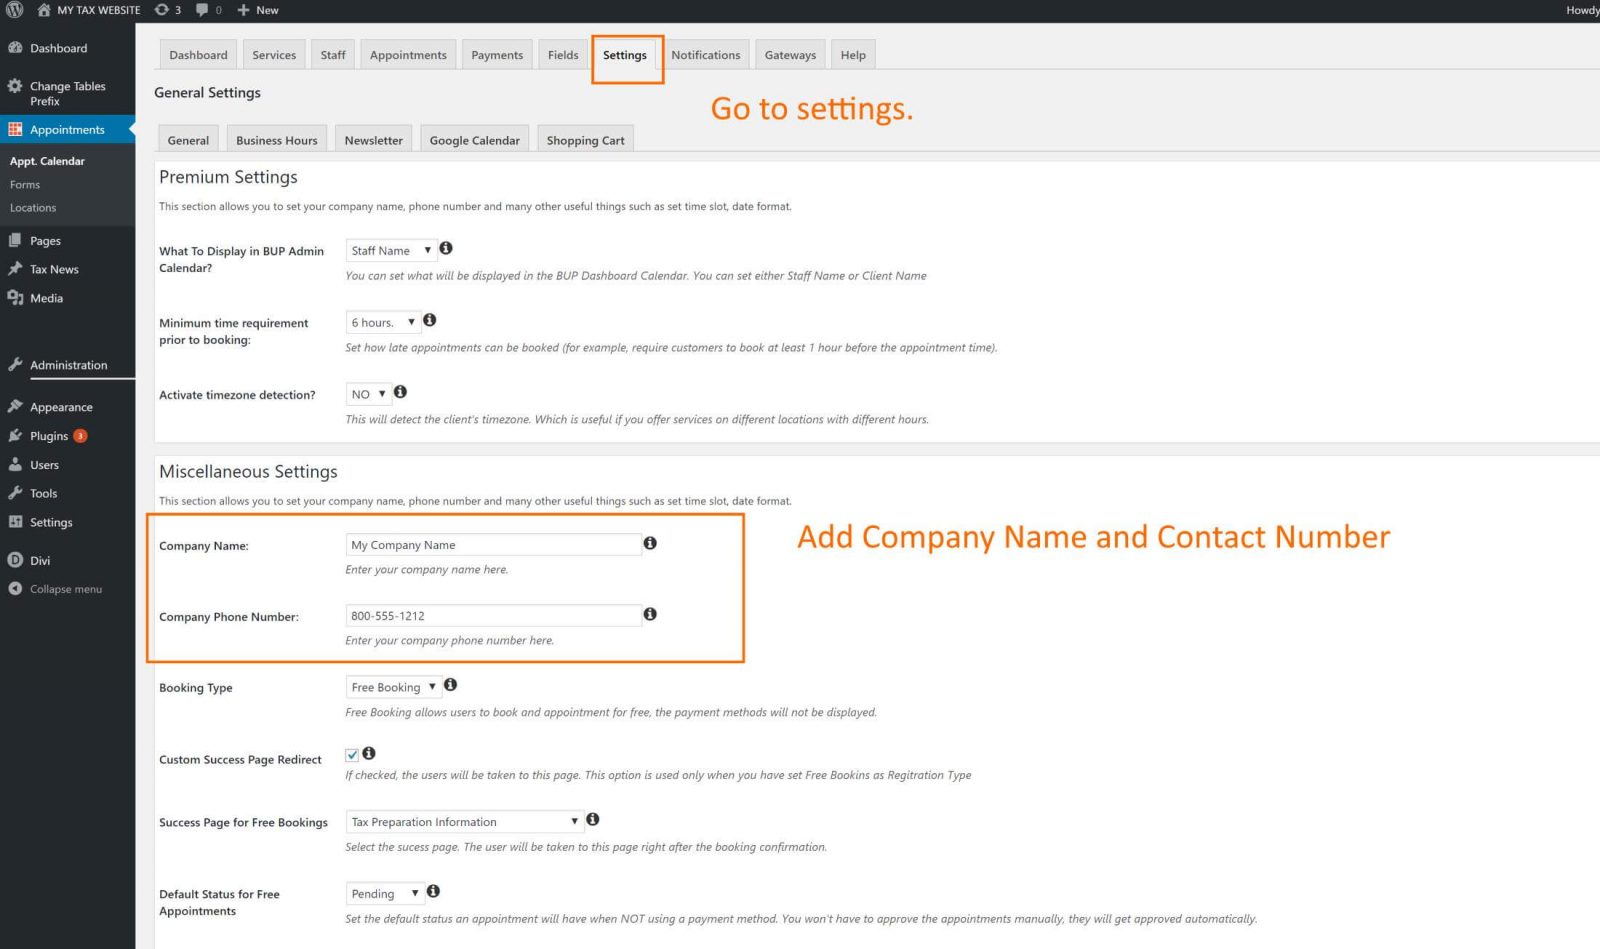
COMPANY DATA
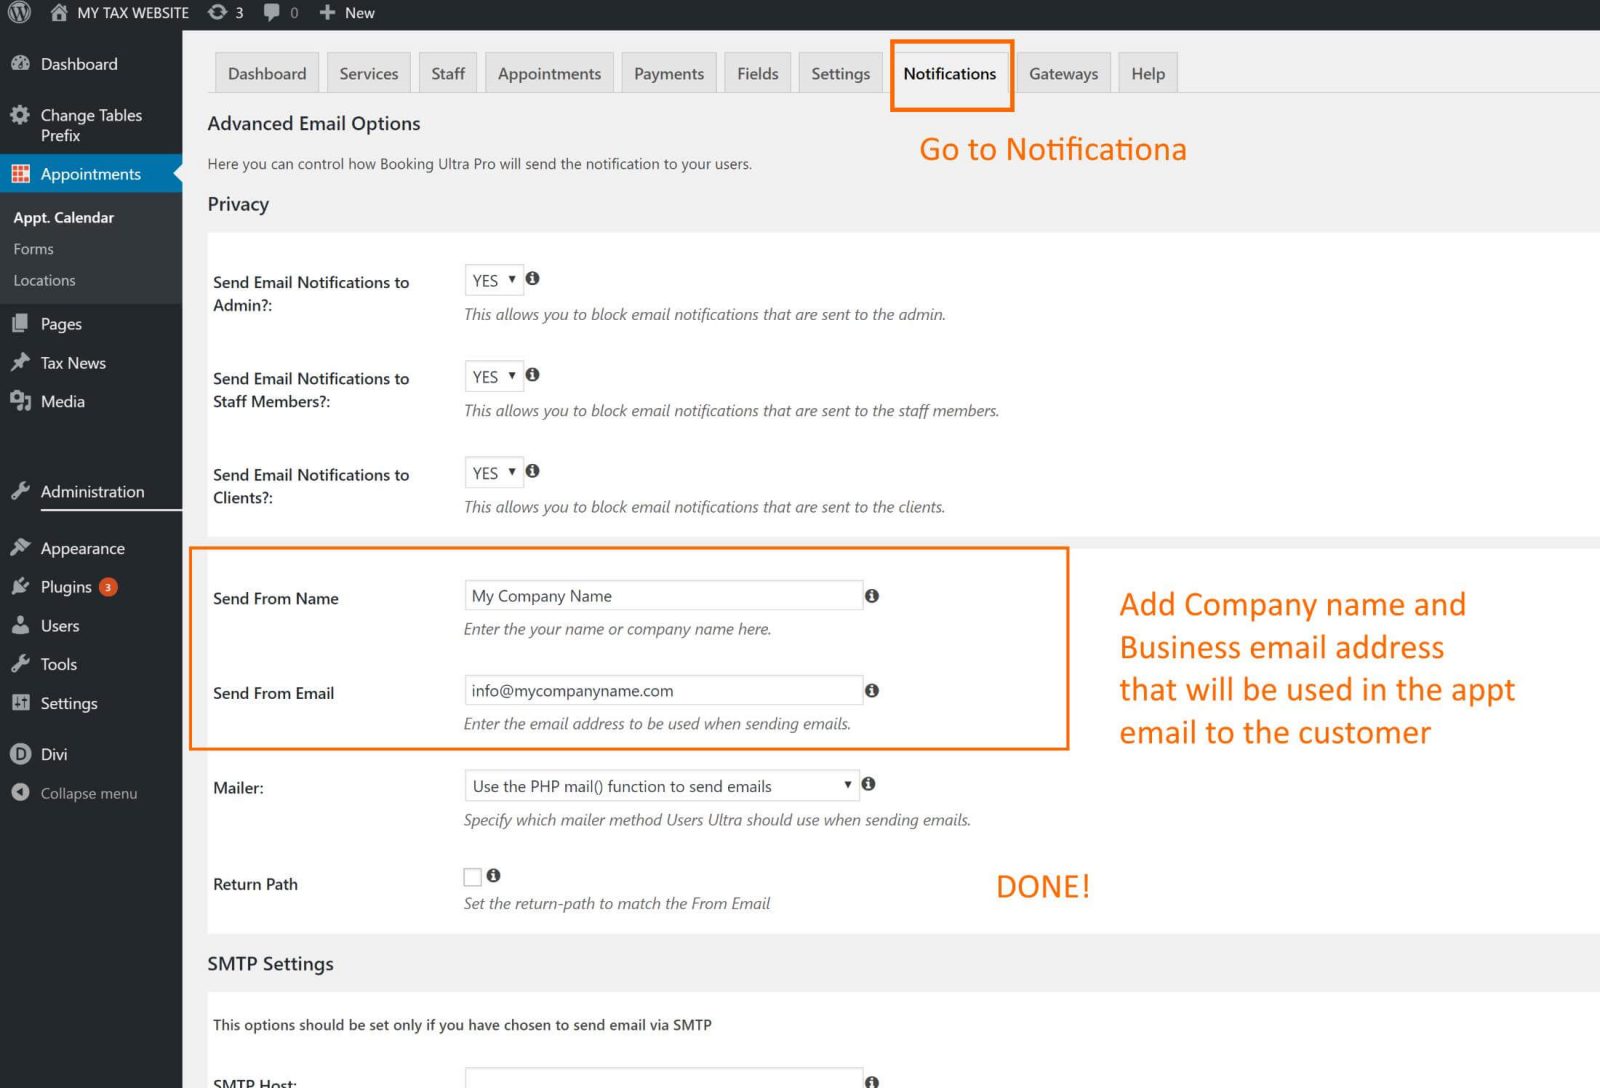
NOTIFICATIONS
Google Calendar - Appointments Integration
The basics to help guide you through the integration with Google Calendar and your TaxPro Appointments.
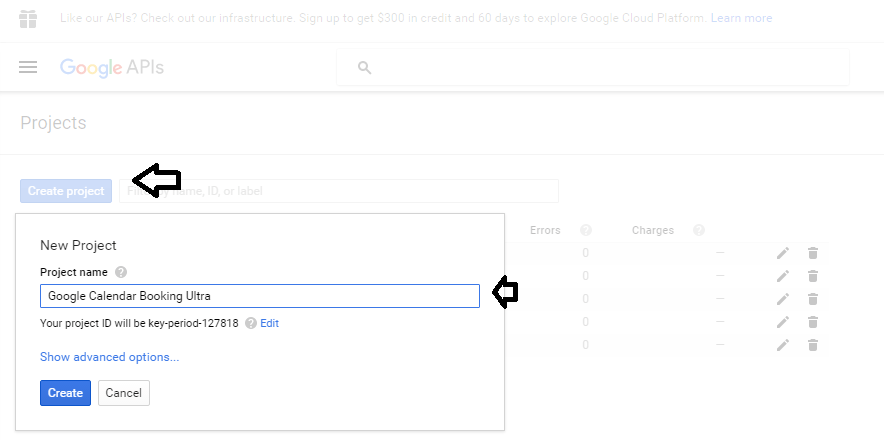
1 – Go to the Google Developers Console. (external link)
2 – Select a project, or create a new one.
3 – Click in the upper left part to see a sliding sidebar. Next, click API Manager. In the list of APIs look for Calendar API and make sure it is enabled.

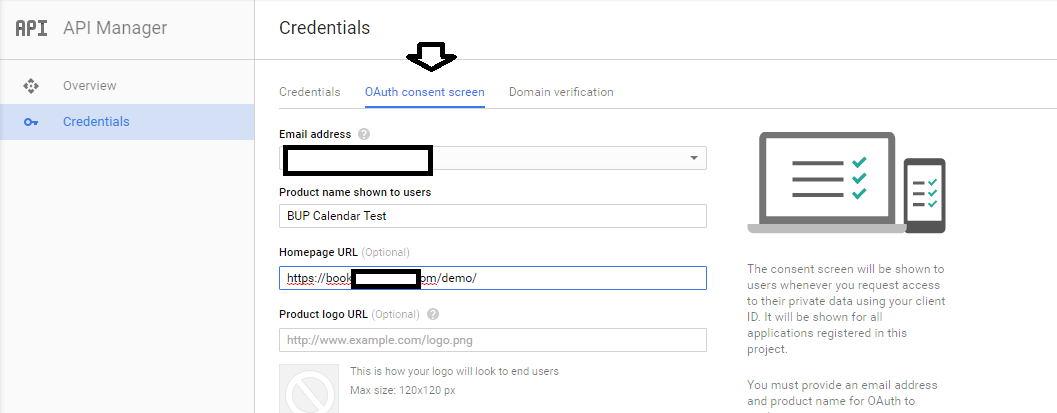
4 – Click on OAuth consent screen Tab.
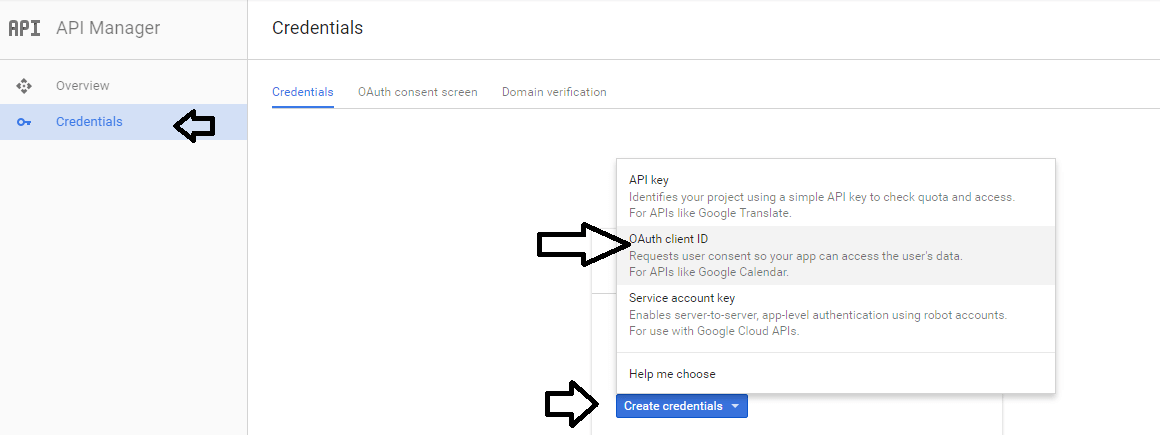
5 – Click on the Credentials Tab.
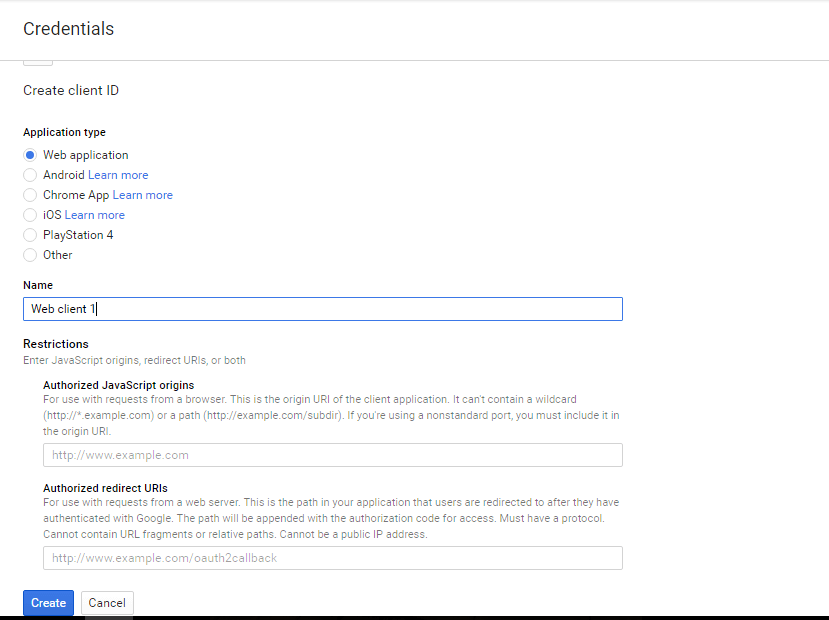
6 – Set the Application information & Create your Project.
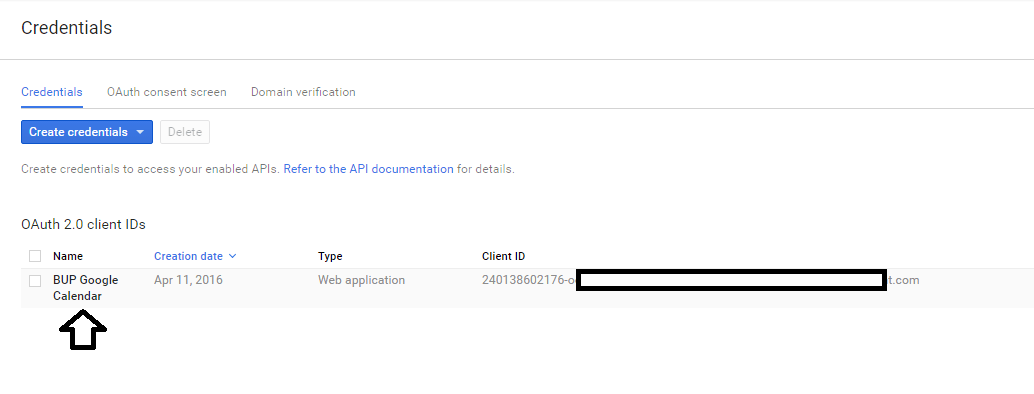
7 – Click on Credentials.
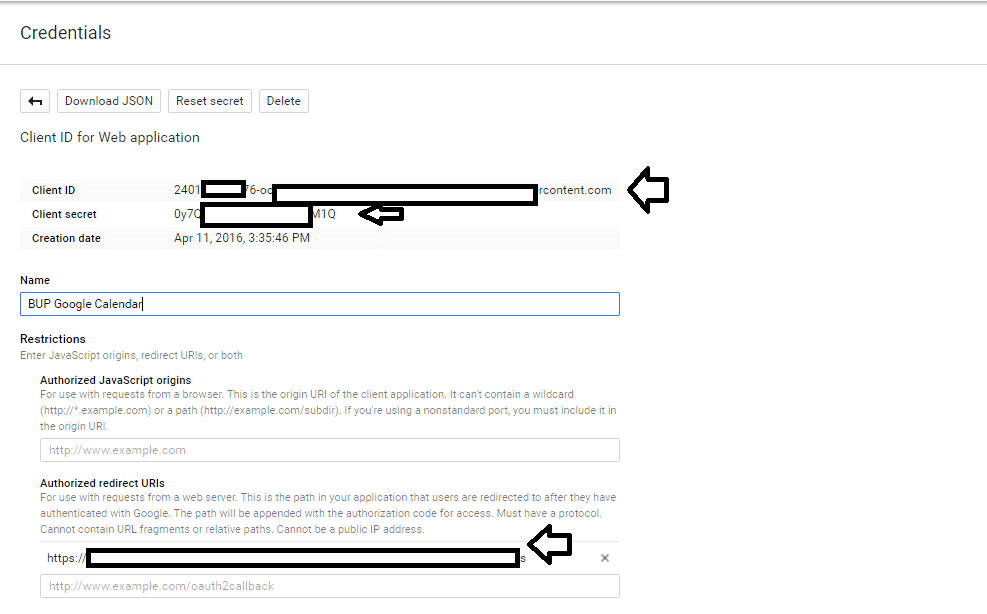
At this point, your Project has been created and it will be listed in the Credentials tab. Just click on it and you will be able to see the Client ID and Client Secret.
8 – Client ID and Client Secret.
You will need to use the above information to start using APPOINTMENTS with Google Calendar.
9 – Go back to your site, Appointments. Go to Settings then Google Calendar.
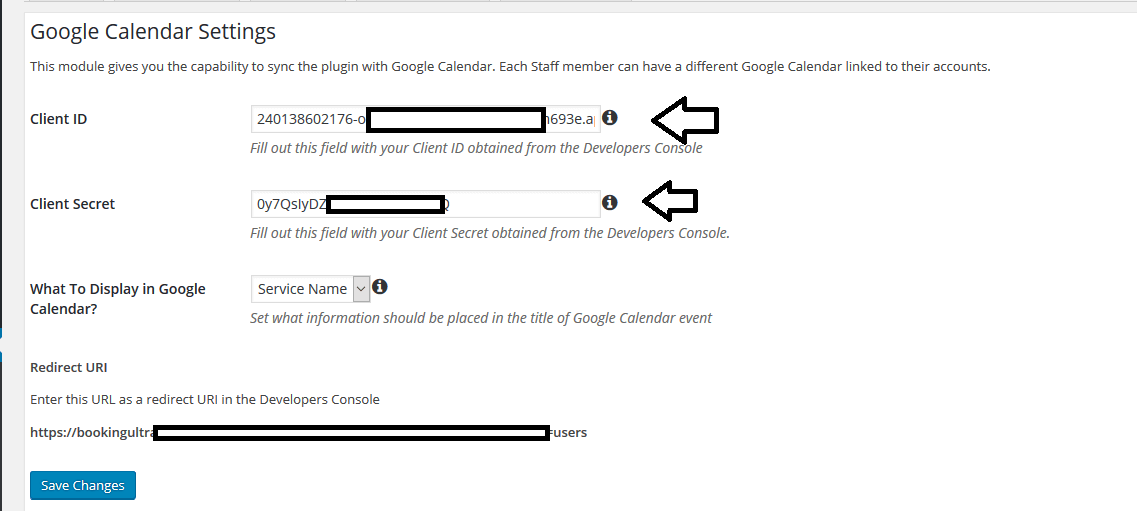
10 – Next, go to Staff – Select Staff Member.

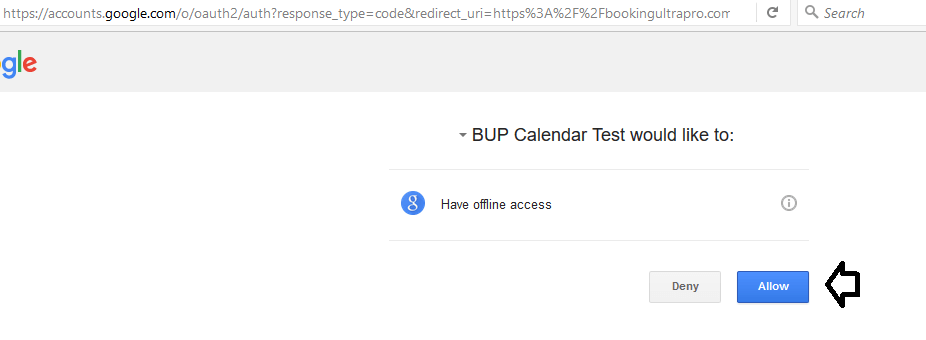
You will see the following screen right after you click on the Connect Me button..
If everything goes right on the authorization you should see your calendars as displayed below:
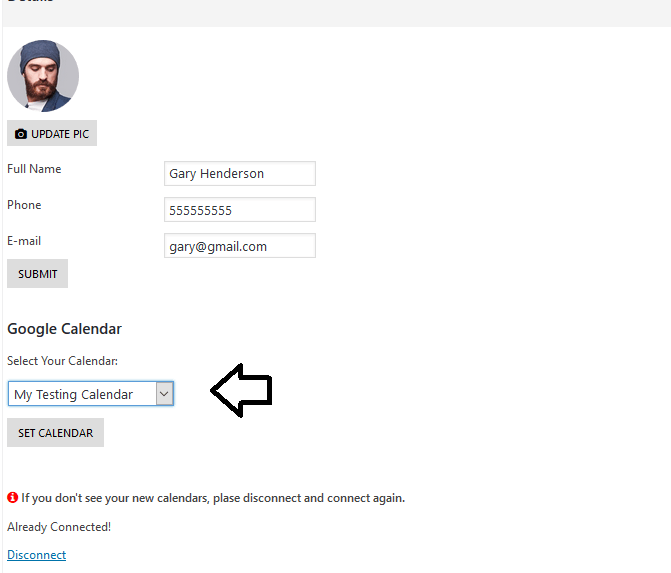
IMPORTANT: If you don’t see your calendars it means that your hosting is not allowing APPOINTMENTS to connect to your Google API.
Please note: If you don’t set a calendar, the primary calendar will be used as default and you will see your appointments in your main calendar.
Allowing Staff Members To connect Their Google Calendars.
If you want to let your staff members to connect to Google Calendar you have to add an additional redirect URI.

Please make sure that the second Authorized URI matches the user’s account URL in your website. This point is very important, otherwise the authorization will fail.